
Understanding the Aesthetic of Shiplap
What is Shiplap?
Shiplap is a type of wooden board that is characterized by its unique interlocking design. Typically used in construction and renovations, shiplap boards have a rabbet on the edges, allowing them to snugly fit together, creating a tight, weather-resistant seal. This feature not only enhances structural integrity but also brings a distinctive aesthetic appeal to walls, making it a favorite among homeowners and designers alike. The familiarity of shiplap has led to its widespread use, particularly in rustic and farmhouse-style interiors, where it evokes a sense of warmth and comfort.
History and Evolution of Shiplap
The origins of shiplap date back to the 19th century when it was primarily utilized in shipbuilding. The overlapping design made it ideal for constructing watertight walls on boats and ships. As time progressed, shiplap transitioned into the world of architecture, particularly in homes. In the early 20th century, it became associated with simple, functional design, often found in rustic cabins and farmhouses.
Fast forward to today, shiplap has witnessed a dramatic resurgence in interior design, primarily thanks to the rise of the modern farmhouse style and popular home renovation shows. It is embraced not only for its rustic charm but also for its versatility, being adaptable to contemporary designs as well.
Shiplap vs. Other Wall Treatments
While shiplap holds a unique position in interior design, it is essential to compare it with other popular wall treatments. One alternative is traditional drywall, which offers a smoother finish but lacks the textural depth of shiplap. Additionally, wallpaper presents various designs but often lacks the dimension and authenticity that wood offers.
Here’s a quick comparison:
- Shiplap: Adds texture, warmth, and character; suitable for rustic and modern styles.
- Drywall: Smooth finish; primarily functional with limited aesthetic appeal.
- Wallpaper: Wide variety of designs; may require more maintenance and can easily tear.
Ultimately, the choice of wall treatment depends on the desired aesthetic and functionality. However, shiplap stands out for its blend of beauty and durability.
Choosing the Right Type of Shiplap
Materials: Wood, PVC, or MDF?
Choosing the right material for your shiplap is essential to achieve the desired look and longevity. The three main types of shiplap available are wood, PVC, and MDF.
Wood: The most traditional choice, wood shiplap can be made from various species such as pine, cedar, or oak. It offers a rich, authentic look and can be stained or painted to fit any decor. However, it may require more upkeep to prevent warping and moisture damage.
PVC: This material is weather-resistant and works well in areas with high humidity. PVC shiplap is lightweight, durable, and easy to install, making it a popular choice for both indoor and outdoor applications.
MDF: Medium Density Fiberboard shiplap offers a cost-effective alternative to solid wood. It is smooth and easy to paint, but while it is less susceptible to weather changes, it may not provide the same level of durability as wood or PVC.
Benefits of Using Shiplap
Integrating shiplap into your home brings numerous benefits beyond aesthetics. Firstly, its insulating properties can help to reduce energy costs by maintaining indoor temperatures. Secondly, shiplap offers a unique way to enhance a room’s character, adding an element of visual interest that can elevate an otherwise plain wall. Additionally, shiplap is relatively easy to install, allowing DIY enthusiasts to take on the project effortlessly.
Lastly, because of its timeless design, shiplap can enhance property value, making it a worthwhile investment for homeowners looking to sell in the future.
Common Finish Options for Shiplap
The finishing touches on shiplap can dramatically alter its appearance and functionality. Here are some popular options:
- Paint: A fresh coat of paint can brighten the space or add dramatic flair. Light colors can open up a room, while dark hues can create a cozy feel.
- Stain: Staining preserves the wood’s natural beauty, enhancing its grains and textures. This option is ideal for a rustic aesthetic.
- Sealers and Finishes: Clear sealers protect wood from moisture and wear, prolonging the life of the shiplap.
Choosing the right finish depends on the room’s function, exposure to moisture, and overall design goals.
Shiplap Installation Guide
Preparing the Wall for Shiplap
Before you install shiplap, it’s crucial to prepare the wall properly. Begin by ensuring that the surface is clean, dry, and smooth. Remove any old wall treatments, nails, or debris that could impede the installation. It’s also wise to check for any electrical wires or plumbing behind the wall that could be damaged during installation.
Using a level, mark where you plan to place the first board. This will help maintain a straight line throughout the installation process.
Step-by-Step Installation Process
1. Cutting the Shiplap: Measure the wall height and cut the shiplap boards accordingly, allowing for expansion gaps at the bottom.
2. Attaching the First Board: Start at the bottom and attach the first board using nails or screws. Ensure it is level.
3. Adding Subsequent Boards: Align the next shiplap board, ensuring it fits snugly into the groove of the previous one, and secure it in place. Repeat until the wall is covered.
4. Finishing Touches: Fill any nail holes with wood filler and sand down rough edges. Finally, apply your chosen finish for a polished look.
Safety Tips During Installation
Safety should always be a priority during installation. Here are some essential safety tips:
- Wear goggles and a dust mask while cutting shiplap to protect your eyes and lungs.
- Use a stud finder to locate studs behind the wall for secure attachment.
- Be cautious when using power tools; ensure you understand their operation.
Taking these precautions can help ensure a safe and efficient installation process.
Styling Your Space with Shiplap
Popular Interior Design Trends with Shiplap
Shiplap has become synonymous with several interior design trends. One of the most prominent is the modern farmhouse style, characterized by a blend of rustic elements and contemporary sophistication. Shiplap can also be found in coastal designs, where its natural textures echo the nearby shoreline.
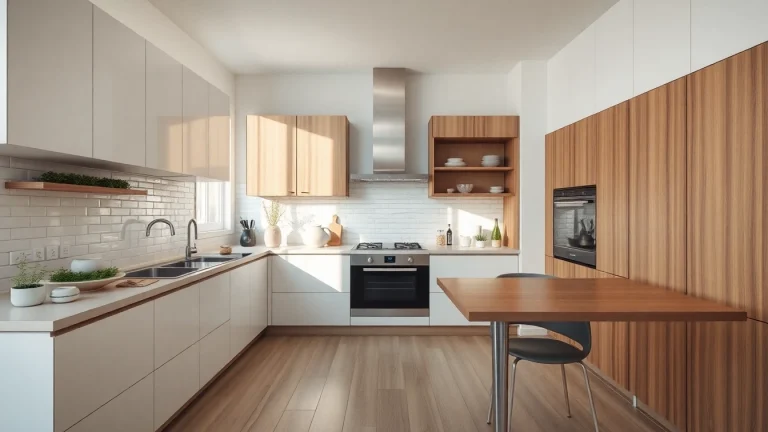
Another trend is using shiplap to create accent walls, which can serve as a focal point in any room. In bathrooms and kitchens, shiplap can enhance the cozy aesthetic while being functional and easy to maintain.
Creating Feature Walls with Shiplap
Feature walls offer unique opportunities to inject personality into a space. When using shiplap for a feature wall, you can play with different colors, patterns, and arrangements:
- Vertical Configuration: Running shiplap boards vertically can create an illusion of height in a room.
- Painted Patterns: Experimenting with different finishes, like chevrons or stripes, can provide a modern twist.
- Backdrops for Art: Utilizing shiplap as a backdrop for artwork can create a stunning visual appeal.
When properly executed, a shiplap feature wall can completely transform the atmosphere of a room.
Mixing Shiplap with Other Design Elements
An exciting way to enhance your space is by mixing shiplap with other design elements. For example:
- Combining with Brick: Brick and shiplap together create a compelling juxtaposition of textures.
- Mixing different woods: Combining shiplap with wooden furniture or cabinetry can provide cohesiveness and warmth.
- Complementing with Metal Accents: Incorporating metal fixtures or furniture alongside shiplap can add an industrial touch.
When pairing shiplap with other materials, ensure that the colors and textures complement one another for a harmonious look.
Maintenance and Care for Shiplap
Cleaning and Upkeep
Maintaining shiplap is relatively simple, making it a great choice for busy households. Regular dusting and wiping down the surface with a damp cloth can help keep it looking fresh. For painted or stained surfaces, a gentle cleaner may be used to remove stubborn stains without damaging the finish.
In areas prone to moisture, like bathrooms or kitchens, periodically checking for mold or mildew buildup is advisable. Using a mixture of water and vinegar can help treat these concerns naturally.
Repairing Damage to Shiplap
Over time, it’s possible that shiplap may sustain some damage. Addressing this promptly prevents further deterioration:
- Minor Scratches: These can usually be touched up with paint or stain.
- Rot or Water Damage: Carefully remove affected boards and replace them to maintain integrity.
Regular inspections can help catch potential issues early, ensuring the longevity of your shiplap.
When to Refinish Shiplap Walls
Refinishing shiplap walls is necessary to maintain their aesthetic appeal and durability. Generally, it’s advisable to consider refinishing if:
- You notice fading or wear in painted or stained areas.
- There are visible scratches or damage that impact the overall appearance.
- You desire a change in color or design to refresh the space.
Regular refinishing updates the look and helps protect the wood, ensuring shiplap remains a stunning feature of your home.
Frequently Asked Questions
What is the best type of shiplap for indoor use?
Wood is often preferred for indoor shiplap due to its natural aesthetic and warmth. However, MDF is an affordable alternative for painted applications.
Can shiplap be installed over existing walls?
Yes, you can install shiplap over existing walls, but ensure they are smooth and clean. Ensure adequate support is available for stability.
Is shiplap waterproof?
Standard wood shiplap is not waterproof, but PVC options are suitable for high-moisture areas like bathrooms. Always seal wood for added protection.
How do I repair damaged shiplap?
Repair minor scratches with touch-up paint. For more significant damage, remove the affected board and replace it with a new piece.
How often should I clean and maintain shiplap?
Regular dusting should be done as needed, with a thorough clean every few months. Inspect for mold, especially in damp areas.